For readers of Afaqs.com, this is a unique way to checkout the past newsletters of the website. This is an archive of newsletters from Afaqs.com

Tuesday, September 23, 2025

Tip Tuesday: toCompVec() Expression in After Effects

View in browser

Hi ferlin,

It is Tip Tuesday. Today, I will show you a very useful After Effects Expression called toCompVec() which converts vectors from the layer space to the camera view space. So let's dive right in! (This tip comes with a video and a project file)

In this example, I have a simple setup in After Effects. I have a Ukramedia logo and a logo background.

The logo background is just the shape of the Logo but without the UM in it. It is just an orange circle.

Step 1: Make the Logo 3D

First, we need a few of our files converted to 3D. Select the vector logo file [UM Logo 2017.ai] and the "Logo BG." LEFT-CLICK on the 3D icons next to the file name in the After Effects timeline.

Step 2: Turn Off the Logo Background

Let's turn off the Logo BG layer just for a moment.

Step 3: Reveal Rotation Property

Select the [UM Logo 2017.ai] file in the timeline and press R to reveal the Rotation Property.

I want to rotate the Y Rotation of our [UM Logo 2017.ai] past the middle point and then have it disappear. So I only want to see the front face of the Logo, not the back.

I also want to do the same with the X Rotation. That is where toCompVec() Expression comes in handy.

Step 4: toCompVec() Expression Application.

Select the [UM Logo 2017.ai] file - press SHIFT-T to reveal the opacity.

To activate toCompVec() Expressions, ALT-LEFT CLICK on the stopwatch icon on a PC or OPTION – LEFT CLICK on a MAC. Then enter toCompVec([0, 0, 1]) Expression in the text field.

As mentioned above, the toCompVec() Expression is a simple Expression that converts the vector from the layer space to the camera view space.

The first number in our toCompVec() Expression controls the X Rotation, the second number controls the Y Rotation, and the third number controls the Z Rotation. In other words, these numbers will determine direction.

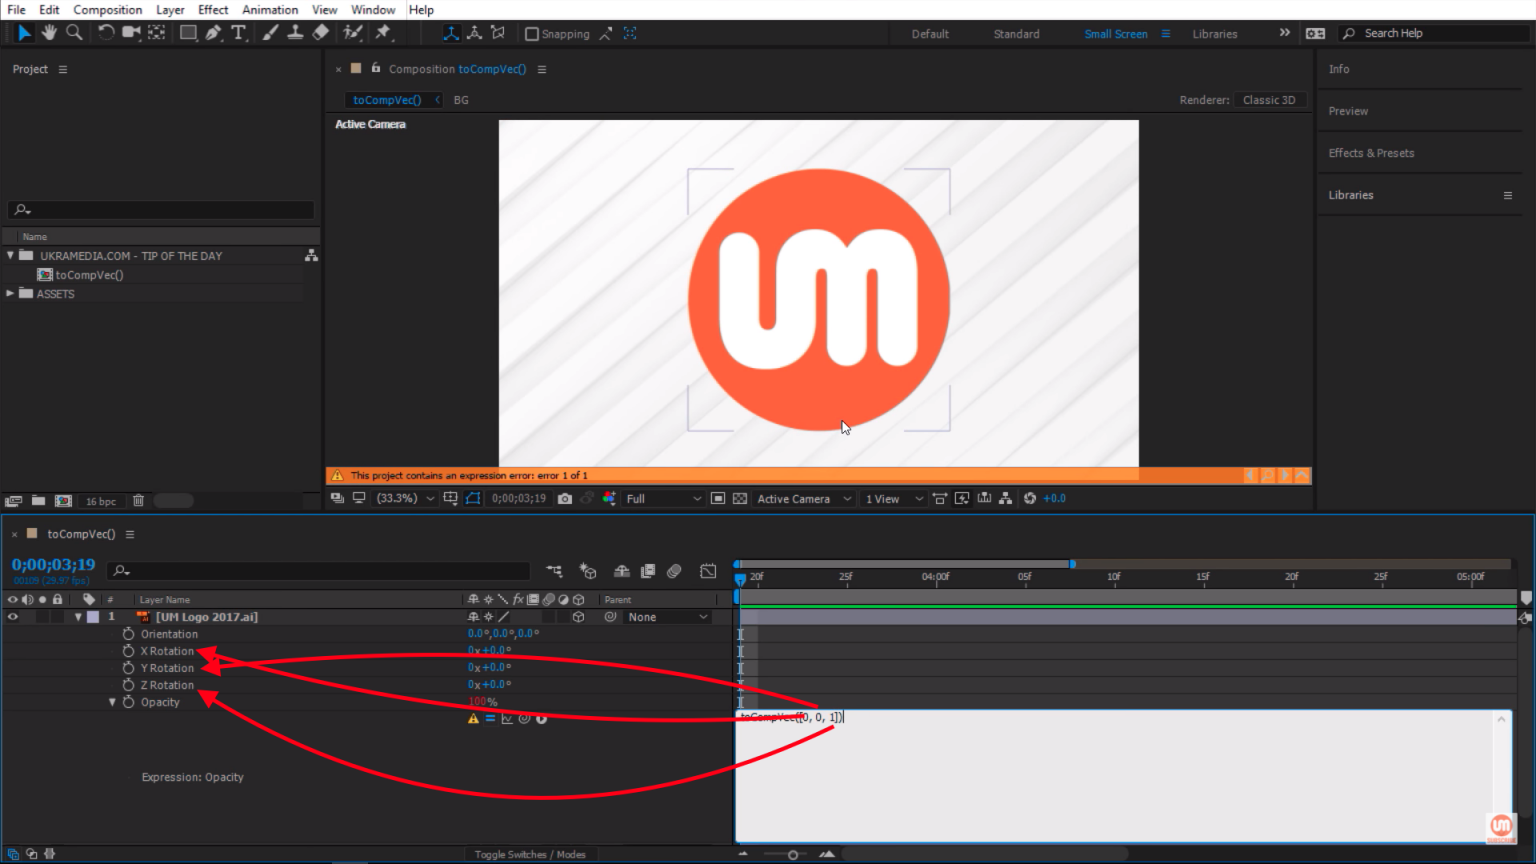
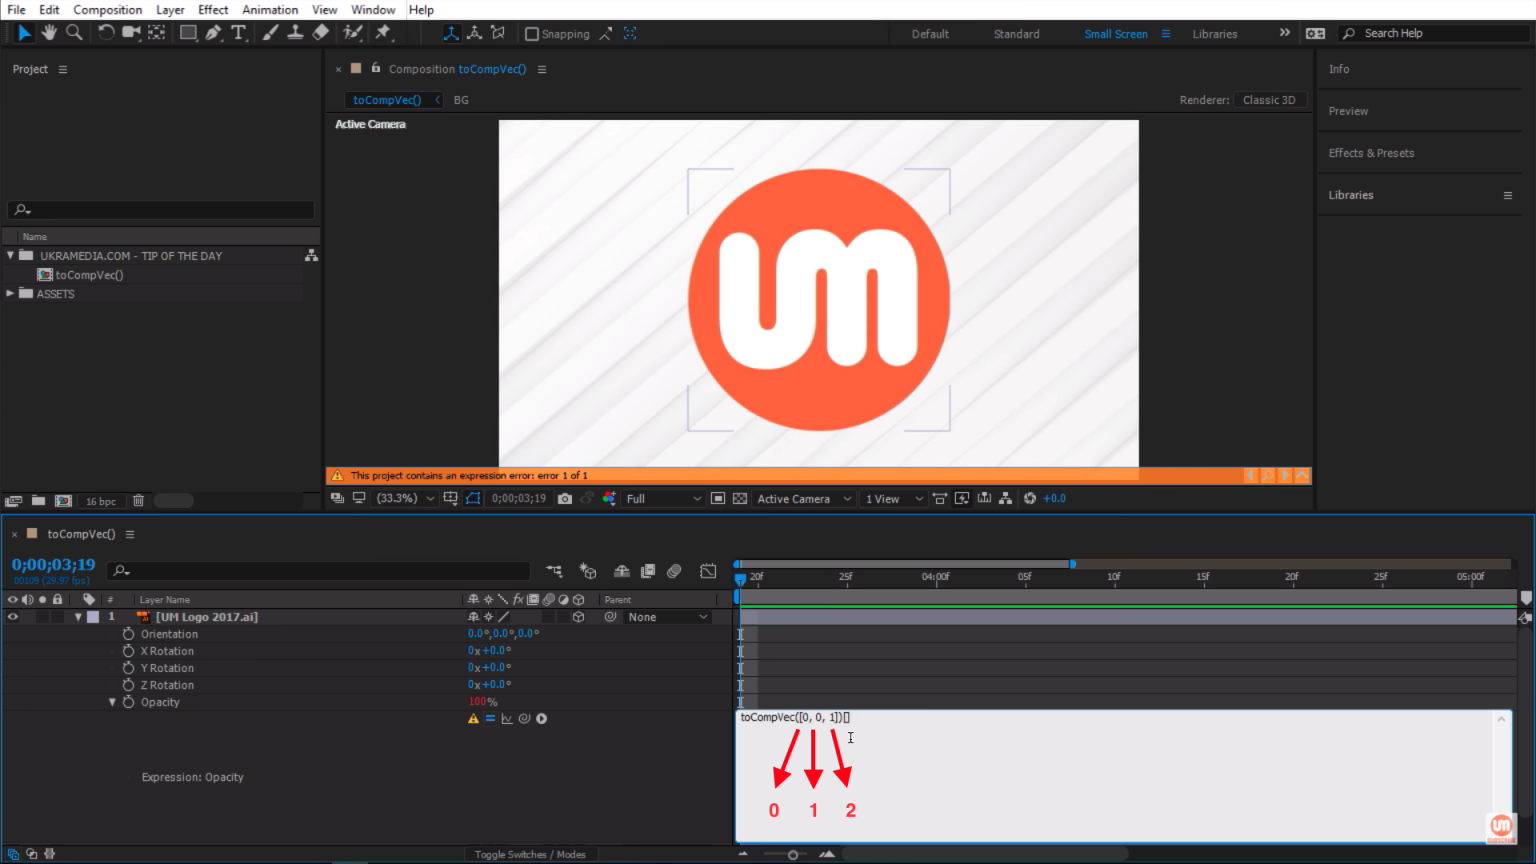
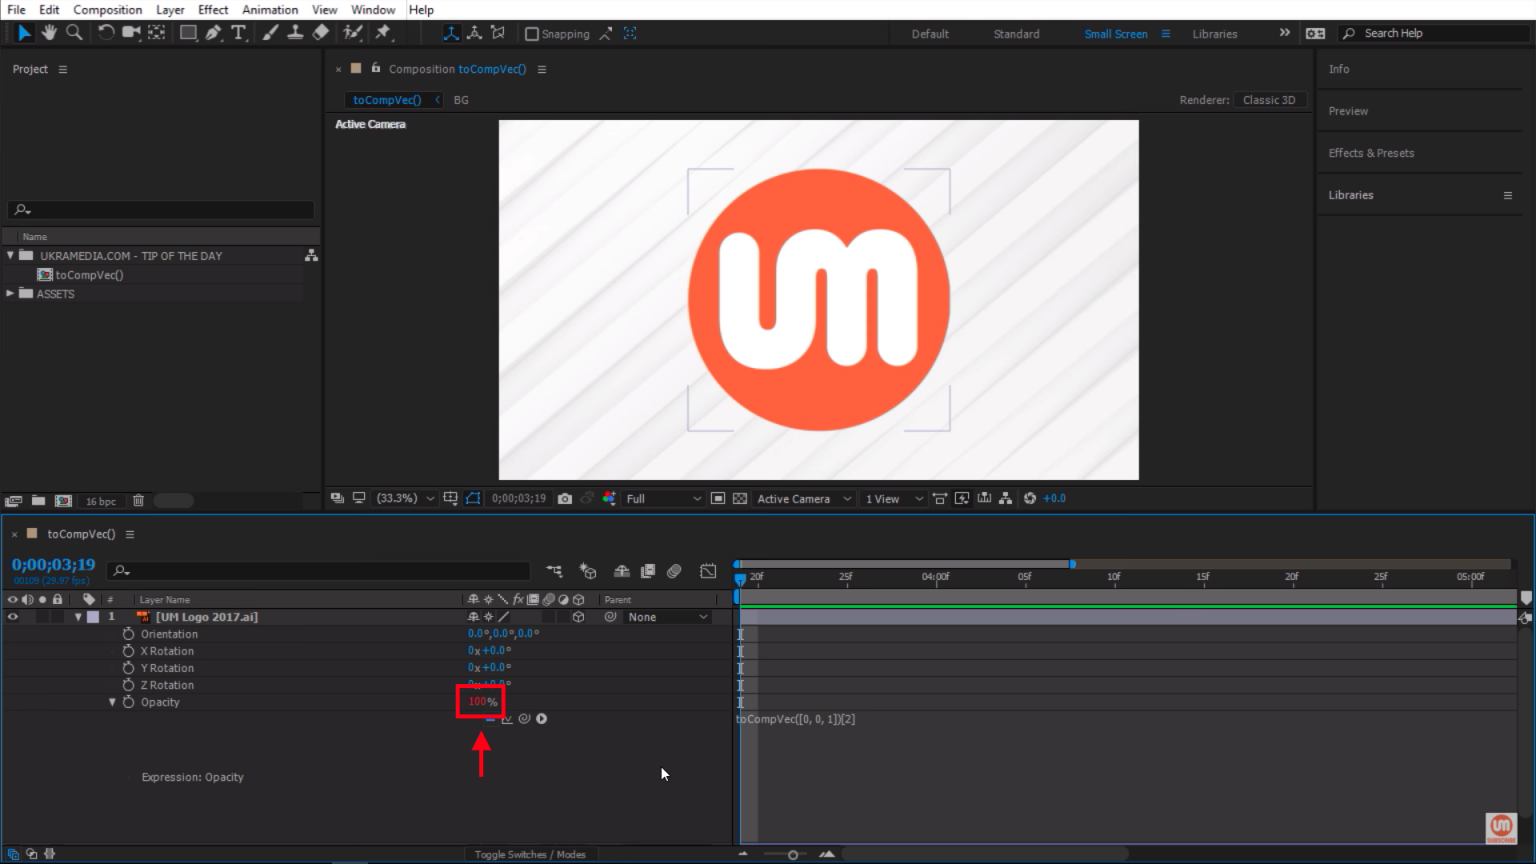
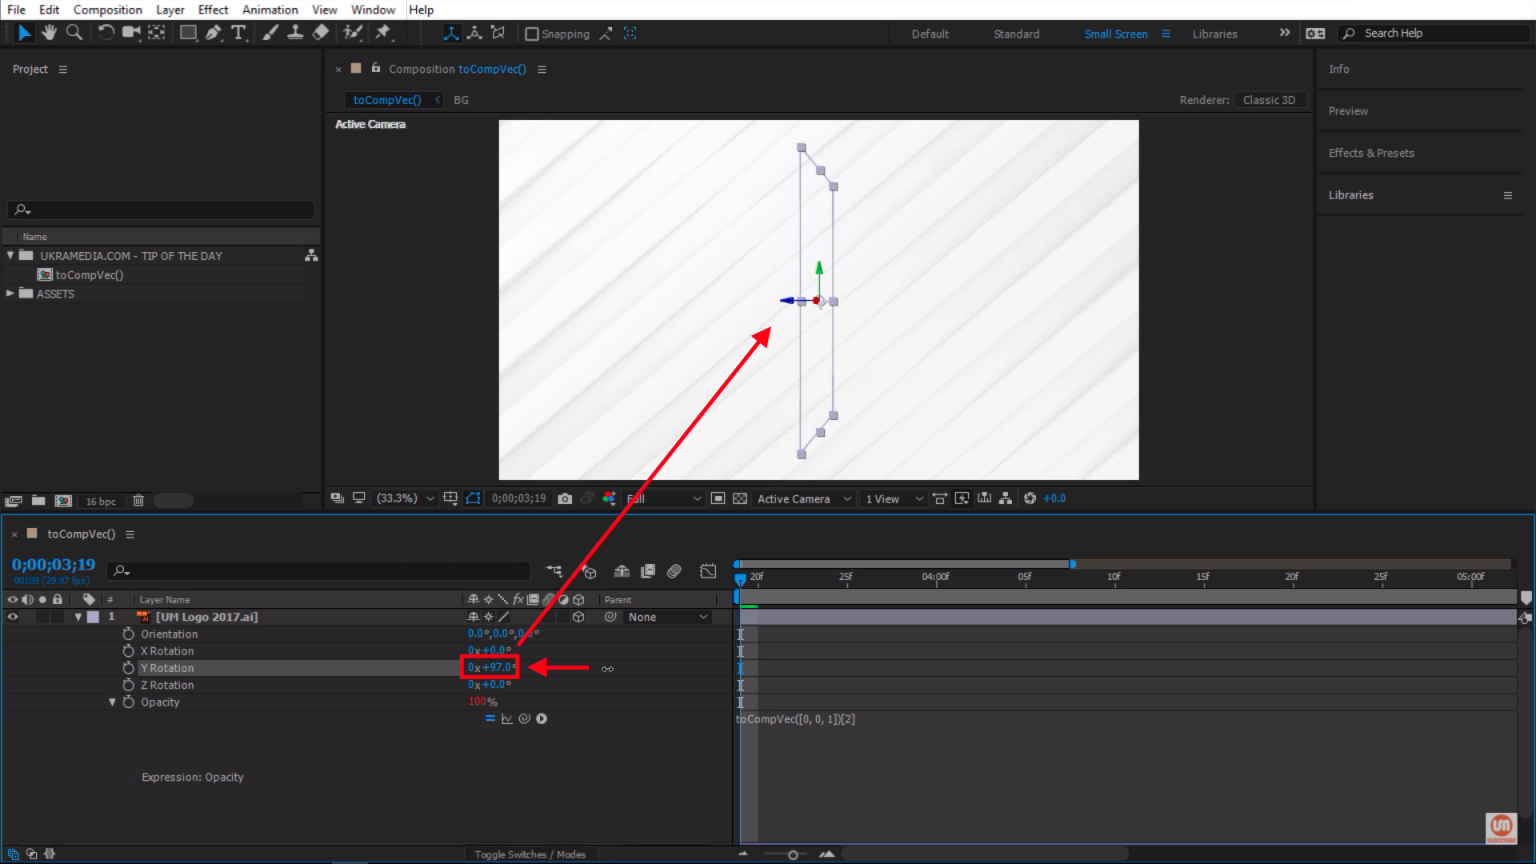
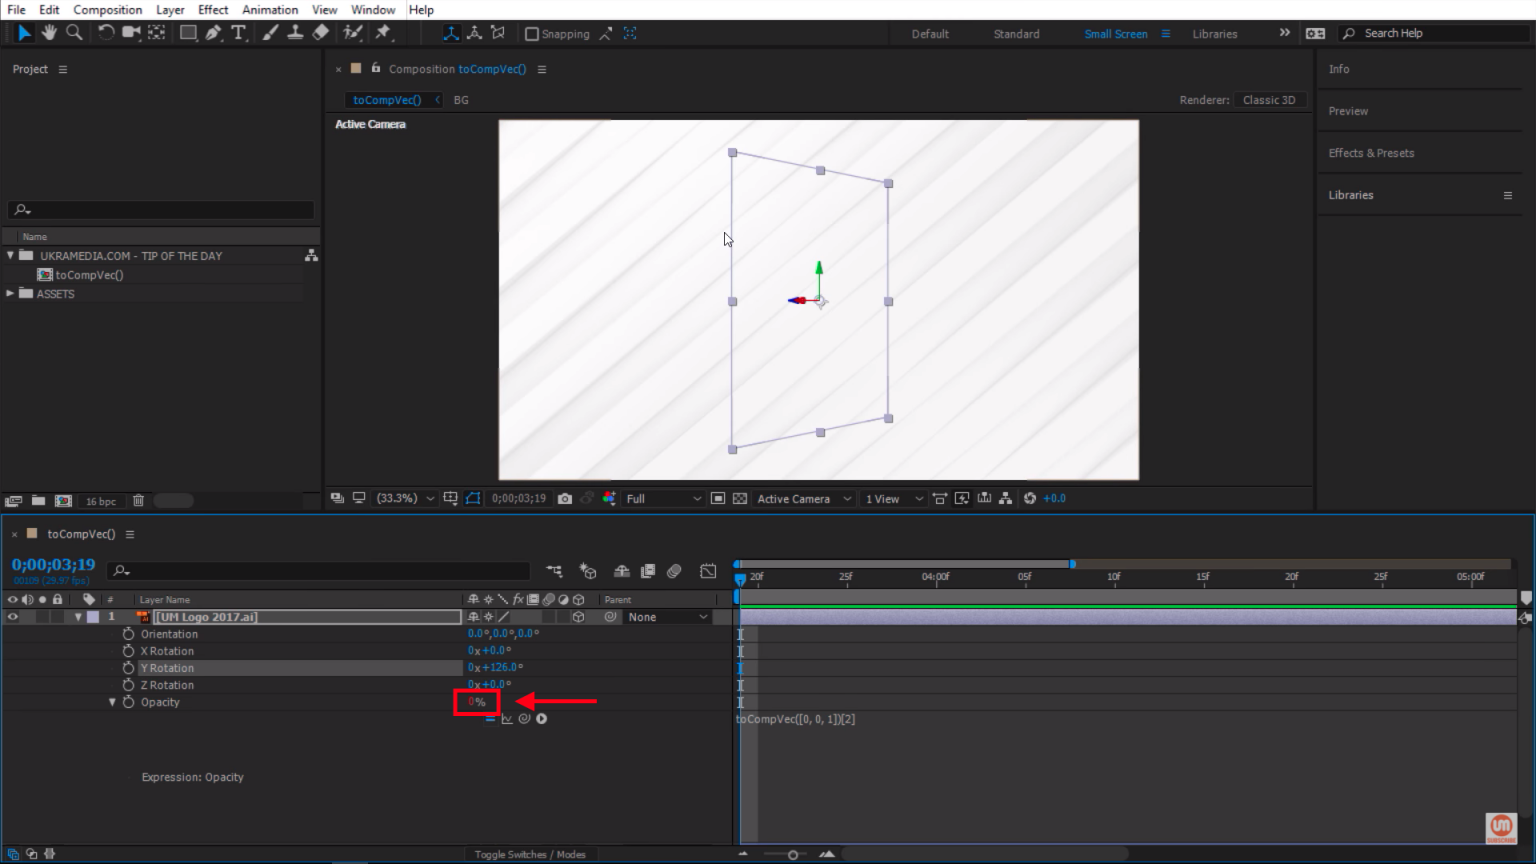
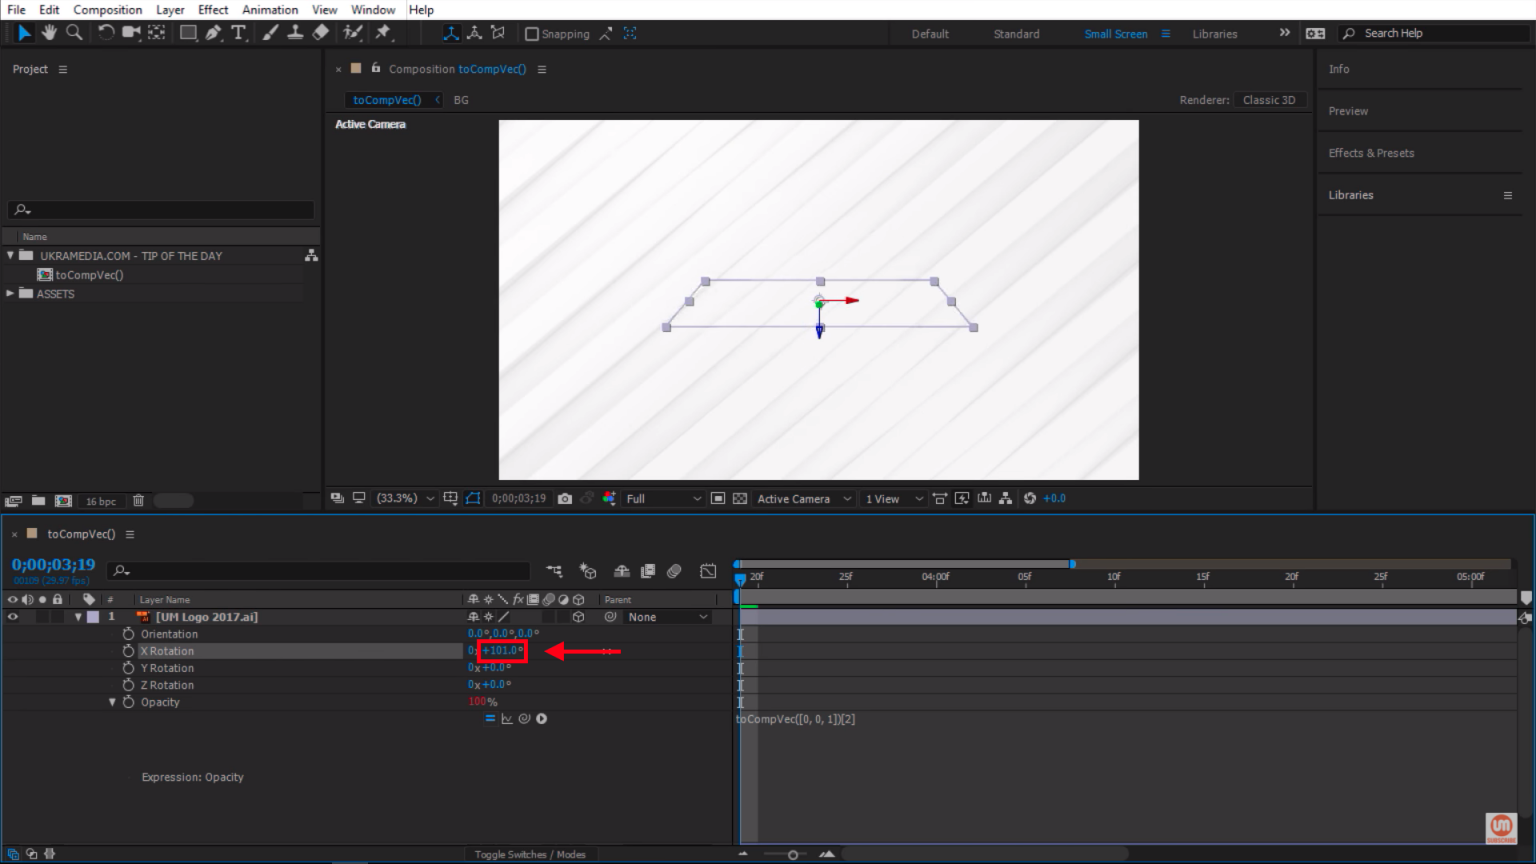
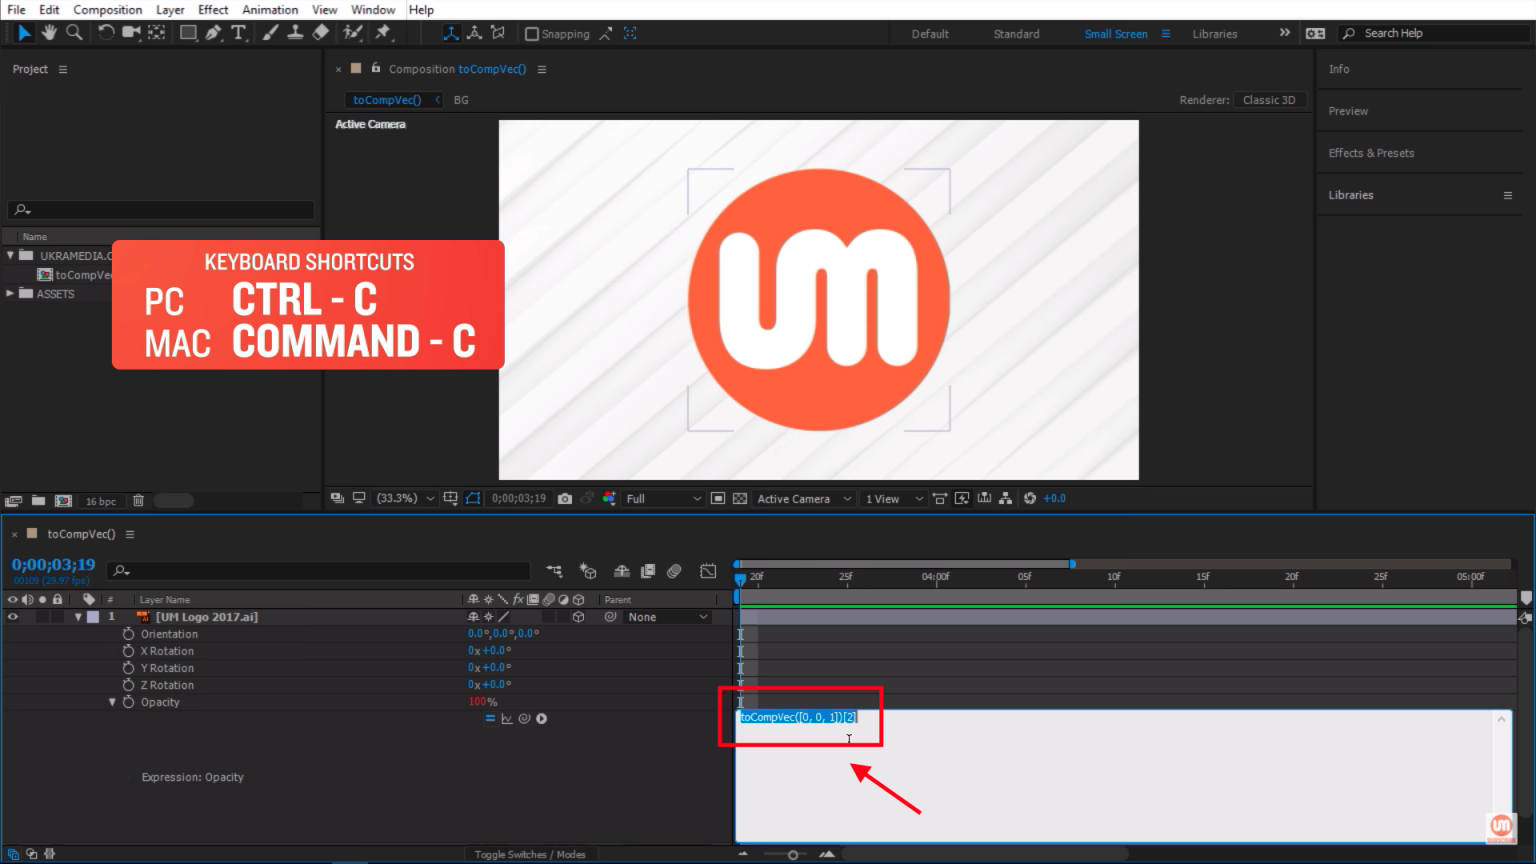
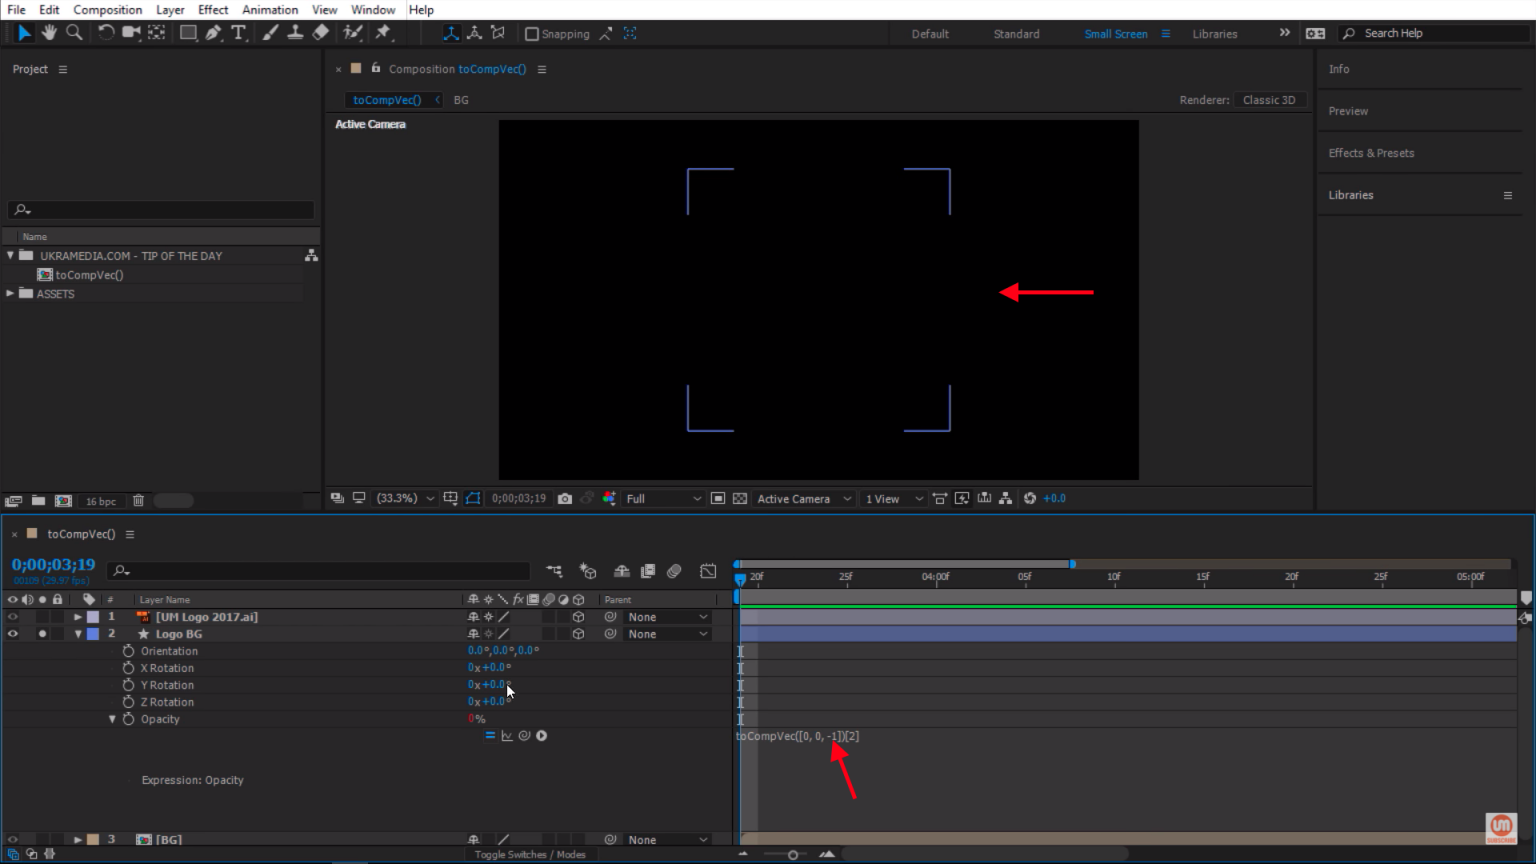
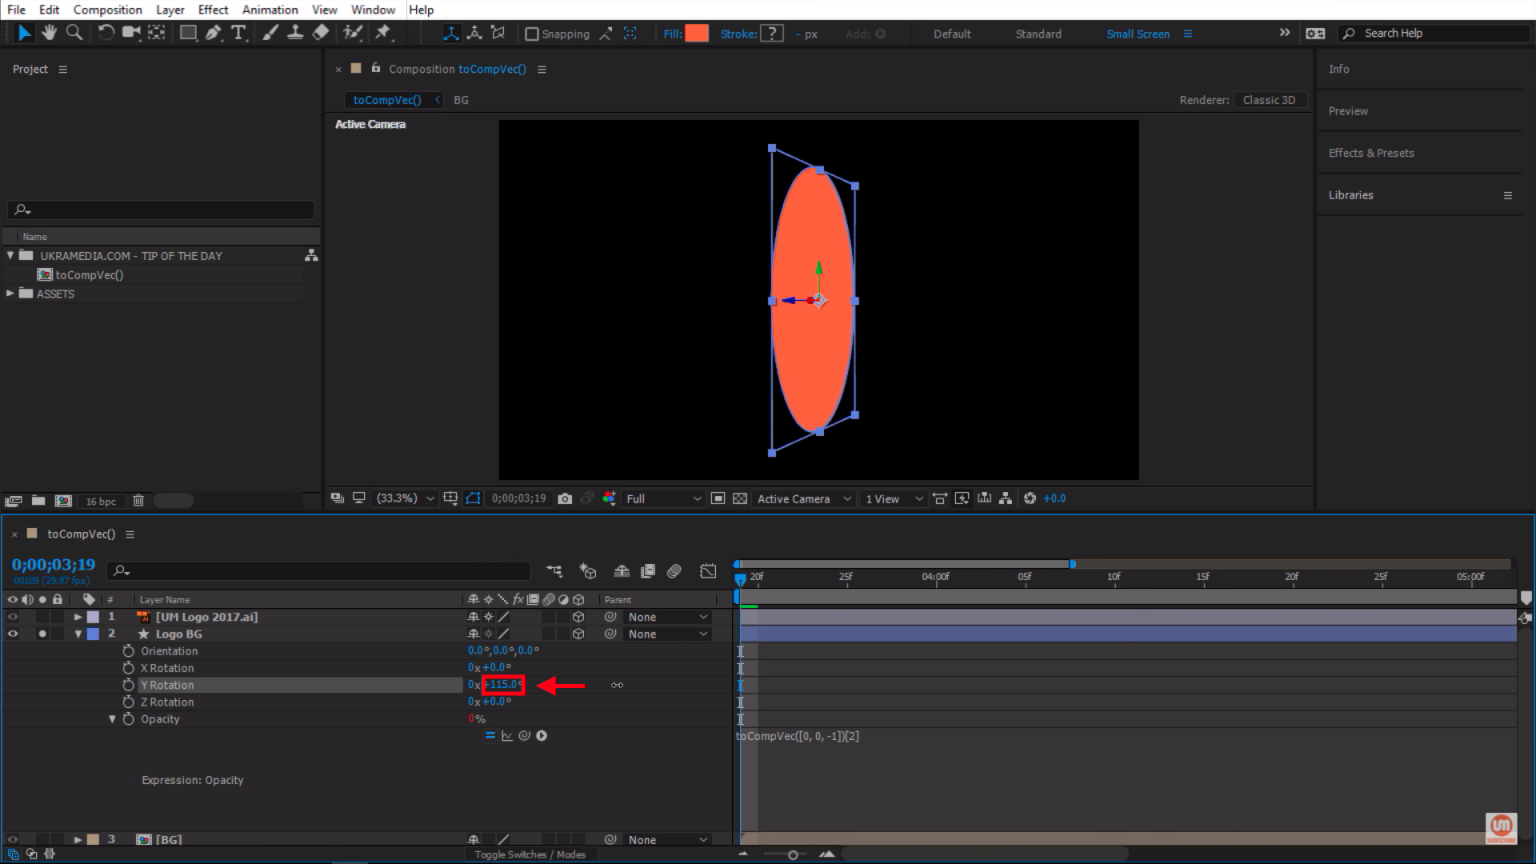
The Z Rotation in our coCompVec() is currently set to 0, so it will make the Logo face towards us.

If it were -1, then it would do the opposite by making the Logo facing away from us.

Let's grab the Z Rotation number from our toCompVec(0, 0, 1) Expression.

To do that, I have to use square brackets at the end like so: toCompVec(0, 0, 1)[].

I have to specify which index number I want to grab from our toCompVec(0, 0, 1) Expression inside those square brackets.

The Z Rotation number is 1. It is the third number from the left; however, the Index considers it as the second number from the left. It can be confusing to understand at first because the Index orders things starting from 0, not from 1.

For example: 

Right now, we have three numbers inside our toCompVec() Expression. Those numbers are 0, 0, 1.

The first number in our toCompVec(0, 0, 1) Expression is 0.

Naturally, we will probably say that this 0 number is the first number of our Expression. Therefore it must be number 1 since most of us start counting from 1 to whatever. However, the Index doesn't look at the order the same way we do.

Index orders things starting from 0. If we have three numbers inside of our toCompVec(0, 0, 1) Expression, the Index will list those numbers from 0 to 3 like so: 0, 1, 2. Let's keep going.

The second number is also 0, but the Index looks at it as the first number from the left.

Lastly, the third and final number in our Expression is 1, but the Index lists it as the second number. I hope this makes sense.

So let's go ahead and enter Index 2 inside our square brackets to the end of our toCompVec(0, 0, 1)[2] Expression. Then LEFT-CLICK away from the white box. It will close out our white box and activate the toCompVec(0, 0, 1)[2] Expression

Now when we look at our timeline, it appears as if nothing has changed. The opacity is still at 100%. That's because our Logo is facing us.

However, if we rotate the Y Rotation of the Logo to the left past the halfway mark, you will notice that our Logo is no longer visible. It will disappear because the vectors are pointing away.

Also, if you look at our opacity, you will notice it is now at 100%. It is now at 0%.

But if we rotate our Y Rotation back to the right, the Logo will appear again. Everything is done automatically with a simple toCompVec() Expression. We don't have to do it manually.

The same thing applies to the X Rotation. If we go past the halfway mark, the Logo will disappear.

And if we go back, it will appear again. That simple! You can see how handy this can be.

Let's take it a bit further.

Step 5: Parenting layers in Adobe After Effects with toComVec().

I'm going to LEFT-CLICK on our Expression and copy it by pressing CTRL-C on a PC or COMMAND-C on a Mac.

Then I will select the Logo BG and make it visible again by LEFT-CLICKING on the eye icon.

You can see that it is just a plain shape. Nothing crazy, but I am going to press T on my keyboard and ALT-LEFT-CLICK on a PC or OPTION – LEFT-CLICK on a Mac.

LEFT-CLICK on the stopwatch to active the Expression.

Then CTRL-V on a PC or COMMAND-V on a Mac to paste the same Expression we used from the previous example inside the white box.

Then press SHIFT-R on your keyboard to reveal the rotational properties. Now I can see the same thing happening to the layer here.

Here is what I want to do this time. I want it to the same thing that we did before but in reverse.

Now I am going to change the direction of our toCompVec(0, 0, 1)[2] Expression. Instead of 1, I am going to set our Z Rotation to -1.

Z Rotation to -1, you will notice that the Logo BG is no longer visible. That is because we reversed the process.

To make the Logo BG visible again, we have to rotate the Logo BG file past the midway point, just like we did in the previous example.

This comes in handy if we want to create a fake two face 3D look in After Effects.

To do that, we have to first select the Logo BG file and then parent it with the [UM Logo 2017.ai] file by LEFT-CLICK and HOLD on the pick whip. Then drag it to the [UM Logo 2017.ai] file.

Now when the [UM Logo 2017.ai] file disappears, the Logo BG will still be visible.

The same thing applies for both the X & Y Rotations.

I hope you found this quick tip useful. I look forward to sharing another quick tip with you next Tuesday!

Talk soon,

- Sergei


Watch Video
facebook twitter instagram youtube
Ukramedia

P.O. Box 621
Huntersville, NC 28070

You received this email because you signed up on our website or made a purchase from us.

Unsubscribe

No comments: